Getting to know your Users – User Authentication with Django’s built-in views
One of the most common requirements for a web application is to have user accounts:
Users should have accounts and they should be able to log in and log out.
This is called user authentication and is supported by Django out of the box.
In this article, we will add user authentication to the polls app from the Django tutorial. After following this article, the polls app will have these new features:
- Users will be able to log in
- Users will be able to log out
- Users will be able to see if they are logged in
We will be using Django’s built-in authentication views for login and logout. This will save us a lot of code.
Prerequisites
This tutorial builds on the project you build in the Django 2.0 tutorial. If you have already worked through this project and have a working version of the project, you can use that to follow along.
For everyone else, I’ve uploaded the complete code to Github. You can clone the repository using your favorite Git client or on the command line like this:
$ git clone https://github.com/consideratecode/django-beyond.git
Checkout the tag django_authentication_views_end if you want to follow along with this tutorial.
If you are not familiar with Git, you can also download a Zip file with the code:
- Snapshot of the project before the tutorial. Use this as a base if you want to follow along.
- Snapshot of the project after the tutorial.
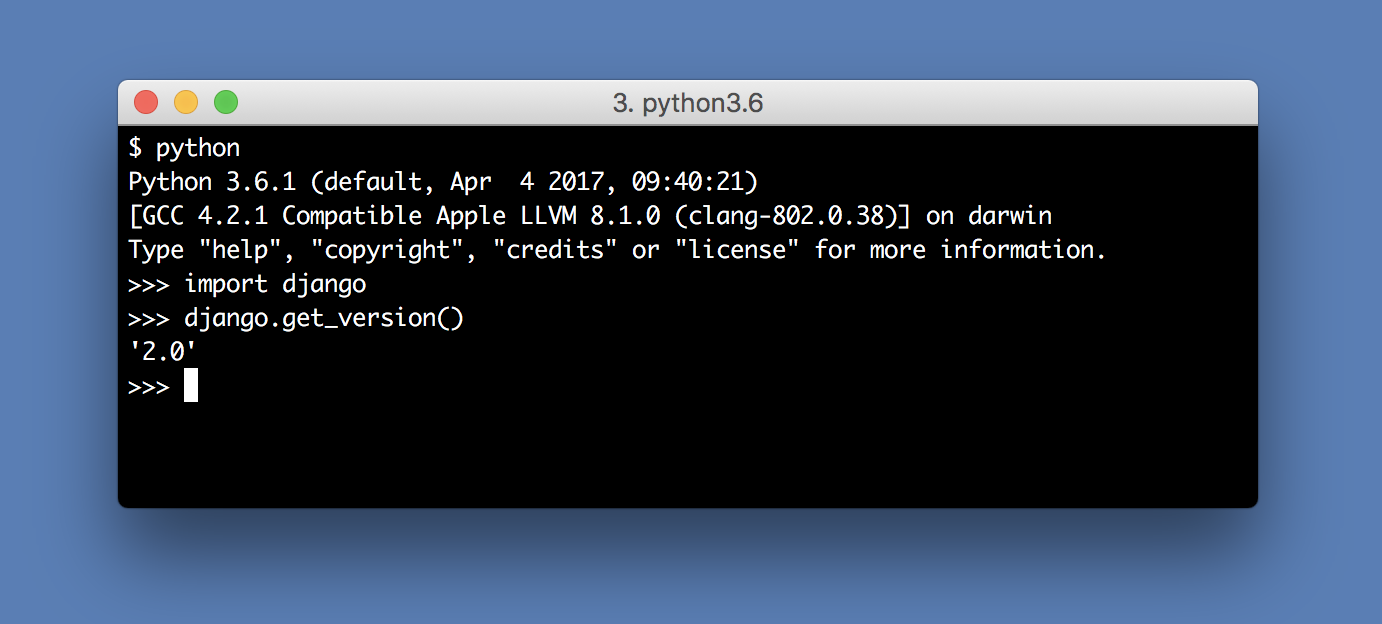
This project requires Python 3.4 or higher and Django 2.0. You can verify that you have the right versions on the command line like this:

Now we have to create a database by running the migrations:
$ python manage.py migrate
We will use the admin interface provided by Django to create users. But to access the admin interface, we need a user. We can solve this chicken-and-egg problem by using the createsuperuser command:
$ python manage.py createsuperuser --username daniel
Email address: daniel@consideratecode.com
Password:
Password (again):
Superuser created successfully.
You can, of course, use whatever username you want.
Now you can run the application:
$ python manage.py runserver
Performing system checks...

System check identified no issues (0 silenced).
January 13, 2018 - 17:25:00
Django version 2.0, using settings 'mysite.settings'
Starting development server at http://127.0.0.1:8000/
Quit the server with CONTROL-C.
Go to http://127.0.0.1:8000/admin/ with your web browser and log in with your newly created user.
Wait, if a user can already log in, what is the point of this tutorial? The login page of the admin is only be meant to be used by staff users, like your newly created superuser. Normal users can’t use this page. We will look at the different kind of users in a future article.
Setting up user authentication
User authentication is provided by the module django.contrib.auth. It is built into Django, so you don’t have to install any extra packages. To use it, you have to make sure four things are enabled in your settings:
- The session middleware, which is also provided by Django.
- The
django.contrib.contenttypesapp. - The
django.contrib.authapp. - The ‘django.contrib.auth.middleware.AuthenticationMiddleware’ middleware.
These are enabled by default when you create a new project with django-admin.py startproject, but let’s have a look at the settings file my_site/settings.py double check.
The setting INSTALLED_APPS should contain 'django.contrib.auth' and 'django.contrib.contenttypes':
INSTALLED_APPS = [
    'polls.apps.PollsConfig',
    'django.contrib.admin',
    'django.contrib.auth',
    'django.contrib.contenttypes',
    'django.contrib.sessions',
    'django.contrib.messages',
    'django.contrib.staticfiles',
]
The setting MIDDLEWARE should contain django.contrib.sessions.middleware.SessionMiddleware and django.contrib.auth.middleware.AuthenticationMiddleware. The order is important, the SessionMiddleware must come first.
MIDDLEWARE = [
    'django.middleware.security.SecurityMiddleware',
    'django.contrib.sessions.middleware.SessionMiddleware',
    'django.middleware.common.CommonMiddleware',
    'django.middleware.csrf.CsrfViewMiddleware',
    'django.contrib.auth.middleware.AuthenticationMiddleware',
    'django.contrib.messages.middleware.MessageMiddleware',
    'django.middleware.clickjacking.XFrameOptionsMiddleware',
]
If you just added the django.contrib.auth app, you have to run the migrations to create the database tables for the user models.
$ python manage.py migrate
If you haven’t changed the settings file, you don’t have to run the migrations, but it doesn’t hurt if you do it anyway.
Using Django’s authentication views
Django provides views that handle login, logout and password reset. We can enable these views by including django.contrib.auth.urls in the URLconf of our project.
Open mysite/urls.py and add the entry path('accounts/', include('django.contrib.auth.urls')) to the urlpatterns list. The code should look like this:
from django.urls import include, path
from django.contrib import admin

urlpatterns = [
    path('polls/', include('polls.urls')),
    path('admin/', admin.site.urls),
    path('accounts', include('django.contrib.auth.urls')),
]
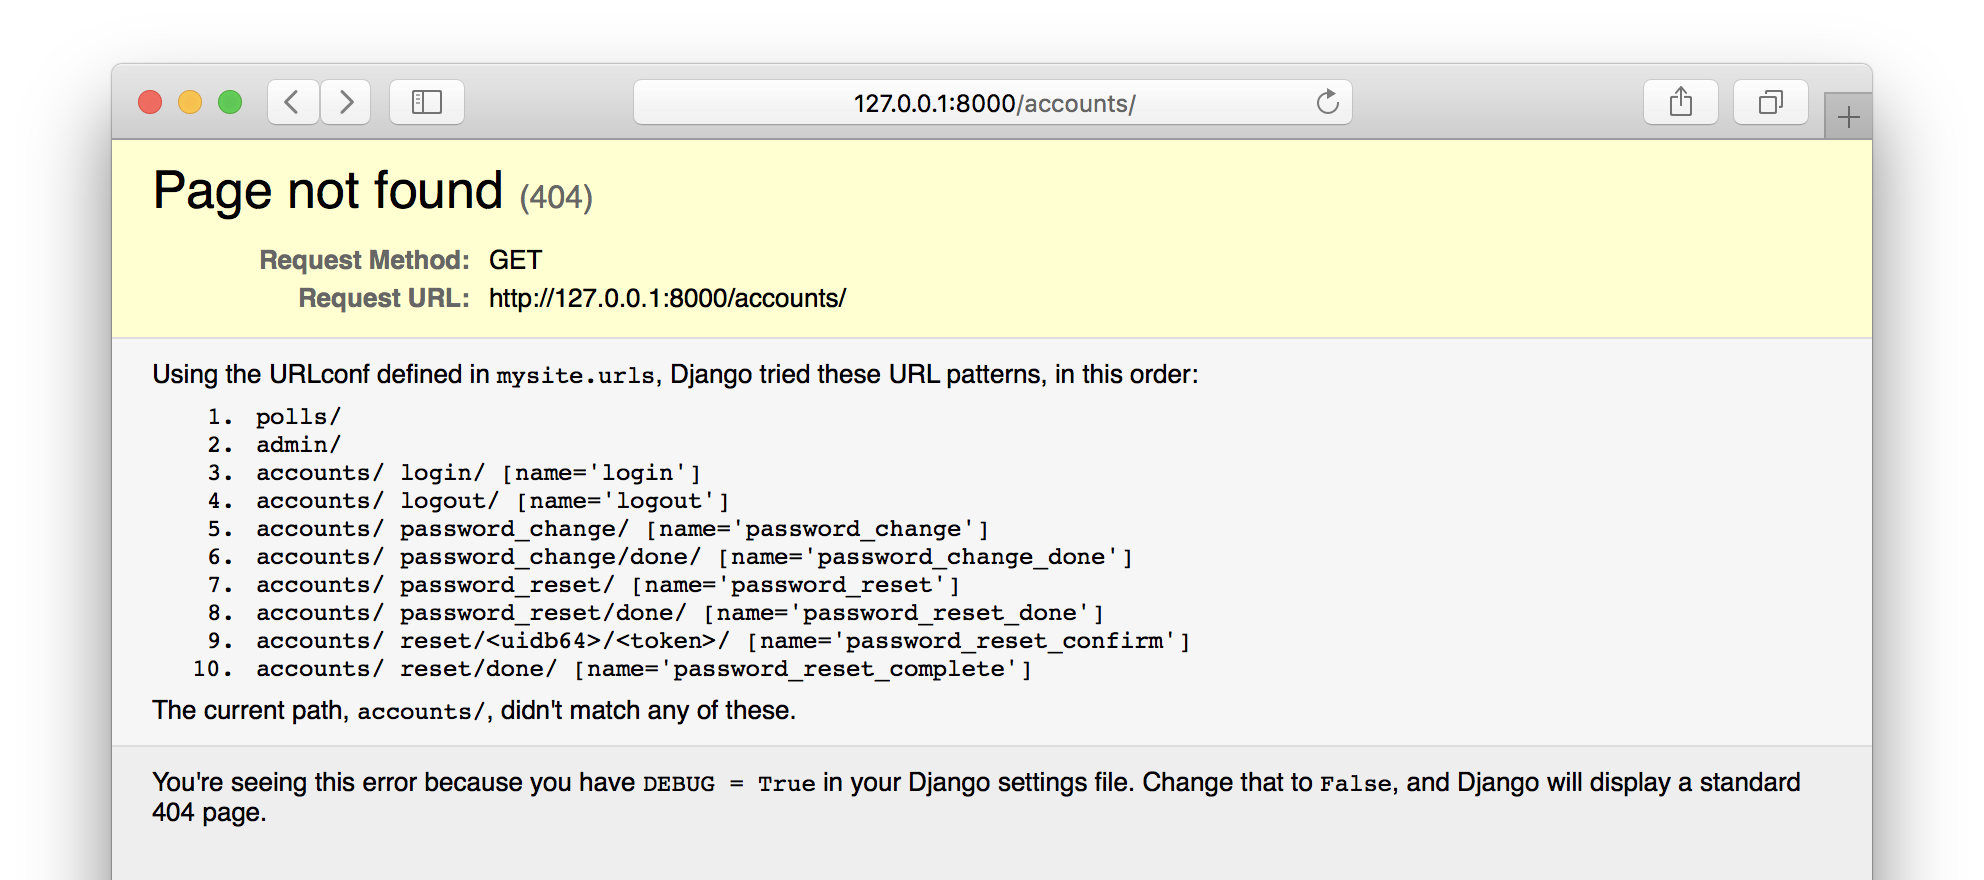
But what URLs did we just activate? There are two ways to find out. You can look at the source code of the django.contrib.auth.urls. Alternatively, you can use a convenient feature of Django. When running with the setting DEBUG=True, Django will output a list of URLs it tried when an invalid URL is requested. Make sure you have the devserver running (python manage.py runserver) and access http://127.0.0.1:8000/accounts/.

Apparently, including django.contrib.auth.urls enabled these URLs:
- accounts/login/
- accounts/logout/
- accounts/password_change/
- accounts/password_change/done/
- accounts/password_reset/
- accounts/password_reset/done/
- accounts/reset/<uidb64>/<token>/
- accounts/reset/done/
You might notice that there are URLs related to password reset functionality. We will look at this in a follow-up article. For now, we only care about accounts/login/ and accounts/logout/.
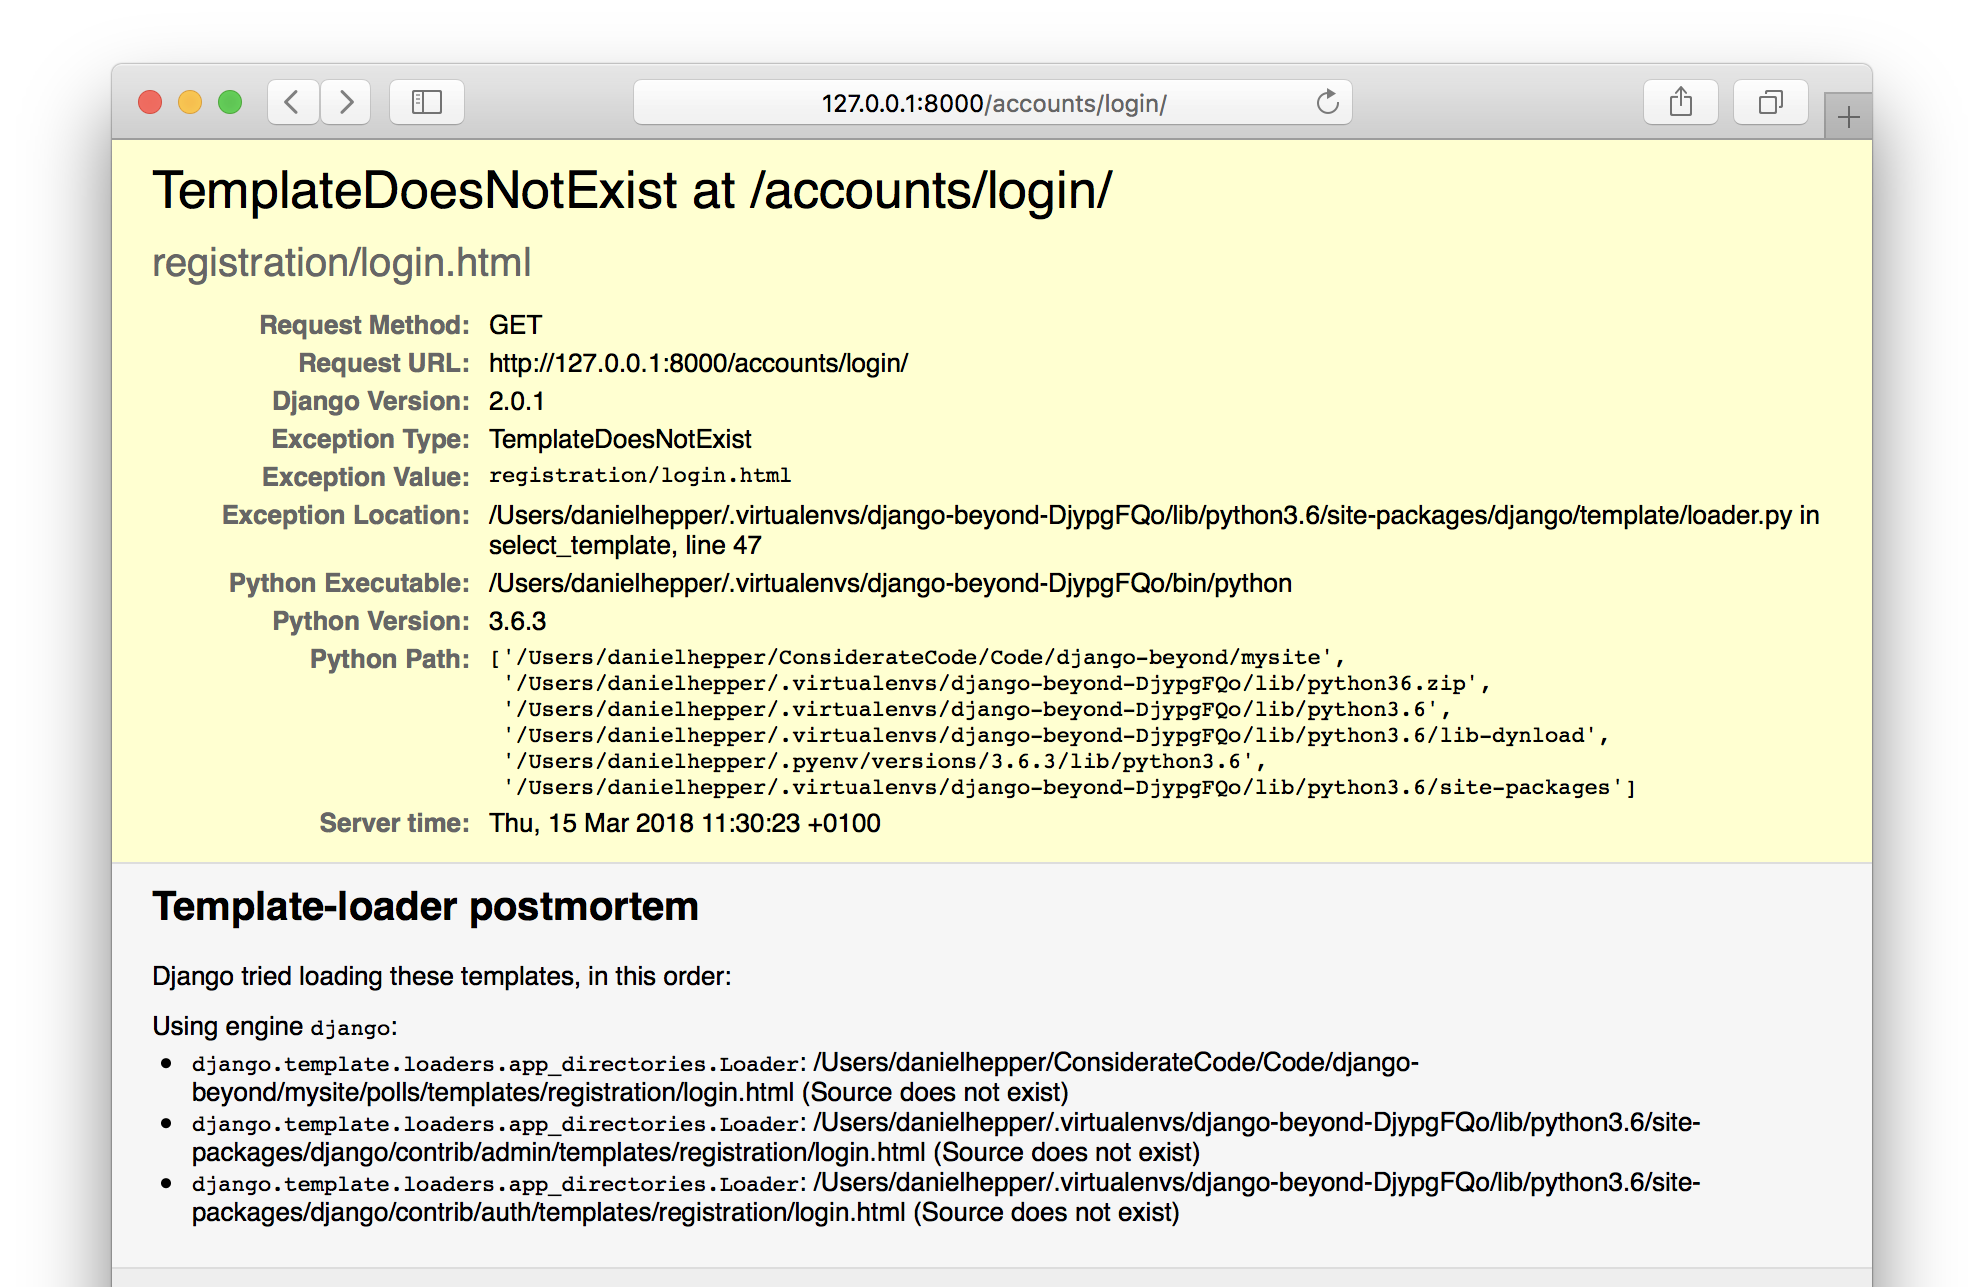
Let’s check out the login URL: http://127.0.0.1:8000/accounts/login/

What’s this? We are greeted by a TemplateDoesNotExist error! This error is actually expected because Django expects us to provide these templates ourselves. Let’s get to it!
Creating the login template
How do we know what goes into the template? Here is what the documentation of the LoginView class has to say:
It’s your responsibility to provide the html for the login template, called
`registration/login.html` by default. This template gets passed four template
context variables:

* form: A Form object representing the AuthenticationForm.
* next: The URL to redirect to after successful login. This may contain a
  query string, too.
* site: The current Site, according to the SITE_ID setting. If you don’t
  have the site framework installed, this will be set to an instance of
  RequestSite, which derives the site name and domain from the current
  HttpRequest.
* site_name: An alias for site.name. If you don’t have the site framework
  installed, this will be set to the value of request.META['SERVER_NAME'].
  For more on sites, see The “sites” framework.
The documentation also gives an example, but let’s ignore it for now and just create the simplest template possible.
Create a directory registration in polls/templates. In this directory, create a file with this content:
{% if form.errors %}
<p>Your username and password didn't match. Please try again.</p>
{% endif %}

<form method="post" action="{% url 'login' %}">
{% csrf_token %}
{{ form.as_p }}

<input type="submit" value="login" />
</form>
Let’s have another look at the login URL: http://127.0.0.1:8000/accounts/login/
That looks better! Well, not better from a design standpoint, but it works!
You can now log in with the user you created earlier. You will then be redirected to http://127.0.0.1:8000/accounts/profile/. This page doesn’t exist yet, so you will get a 404 Page not found error.
Can you figure out from the docs where the URL path /accounts/profile/ comes from? 1
Creating a simple profile page
We are going to fix that 404 error by creating a really simple profile page that just displays the username if the user is logged in and a link to the login page otherwise. We also allow the user to log out.
This template covers it:
{% if user.is_authenticated %}
  You are logged in as {{ user }}.
  <a href="/accounts/logout/">Click here to log out.</a>
{% else %}
  You are not logged in.
  <a href="/accounts/login/">Click here to log in.</a>
{% endif %}
We display this template using a TemplateView, which we hook directly into mysite/urls.py like this:
from django.urls import include, path
from django.contrib import admin
from django.views.generic import TemplateView

urlpatterns = [
    path('polls/', include('polls.urls')),
    path('admin/', admin.site.urls),
    path('accounts/', include('django.contrib.auth.urls')),
    path('accounts/profile/',
         TemplateView.as_view(template_name='accounts/profile.html'),
         name='profile'),
]
That’s it! With just a few lines of code, we enabled our users to log in and log out!
Have a look at the fancy profile page we created:

Some housekeeping
Getting the code to work is only the first part of a developers job. Afterward, you should take some time to polish your work.
We put our templates in the templates folder of the polls app. That doesn’t feel quite right because our registration and profile templates are relevant for the whole project, not just the polls app. Let’s improve this!
First, we create a directory called templates in the base directory of the project.
Then we move the registration and accounts directory from polls/templates to templates.
As a result, your project structure should look like this:
.
├── db.sqlite3
├── manage.py
├── mysite
│   ├── __init__.py
│   ├── settings.py
│   ├── urls.py
│   └── wsgi.py
├── polls
│   ├── __init__.py
│   ├── admin.py
│   ├── apps.py
│   ├── migrations
│   │   ├── 0001_initial.py
│   │   └── __init__.py
│   ├── models.py
│   ├── static
│   │   └── polls
│   │       ├── images
│   │       │   └── background.gif
│   │       └── style.css
│   ├── templates
│   │   └── polls
│   │       ├── detail.html
│   │       ├── index.html
│   │       └── results.html
│   ├── tests.py
│   ├── urls.py
│   └── views.py
├── template
└── templates
    ├── profile.html
    └── registration
        └── login.html
There is one more step: we have to tell Django to look in the newly created directory by adding it in the TEMPLATES setting.
Open the settings file mysite/settings.py and find the TEMPLATES setting starting in line 55 and furthermore the entry DIRS in line 58. We have to add our directory here. Having absolute paths in your settings file is a nuisance because it means that you have to remember to change your settings if you ever move your project to another directory or want to share it with someone else.
The solution is outlined in line 15-16 of the settings file:
# Build paths inside the project like this: os.path.join(BASE_DIR, ...)
BASE_DIR = os.path.dirname(os.path.dirname(os.path.abspath(__file__)))
I’ll leave it to you to figure out how this line of code works and just show you what the TEMPLATES setting should look like.
TEMPLATES = [
    {
        'BACKEND': 'django.template.backends.django.DjangoTemplates',
        'DIRS': [
            os.path.join(BASE_DIR, 'templates'),
        ],
        'APP_DIRS': True,
        'OPTIONS': {
            'context_processors': [
                'django.template.context_processors.debug',
                'django.template.context_processors.request',
                'django.contrib.auth.context_processors.auth',
                'django.contrib.messages.context_processors.messages',
            ],
        },
    },
]
We can also improve our profile page template. Currently, the URLs for login and logout are hardcoded in the profile page template. If we ever decide to change the URL, we have to remember to change this template. A better approach is to use the url template tag to dynamically generate the URL. To figure out the name of the URL pattern, we can have a quick look at the source code of django.contrib.auth.urls or use the trick with the invalid URL outlined above. As you might have guessed, the URLs are named ‘login’ and ‘logout’, so we use those in the template accounts/profile.html:
{% if user.is_authenticated %}
  You are logged in as {{ user }}.
  <a href="{% url 'logout' %}">Click here to log out.</a>
{% else %}
  You are not logged in.
  <a href="{% url 'login' %}">Click here to log in.</a>
{% endif %}
Finally, we are going to take care of the logout page. It currently uses a template from the Django Admin, which might confuse your regular users.
We are going to add a template that matches our retro-plain text theme.
To figure out which template to overwrite, we consult the documentation of the LogoutView:
class LogoutView
...
Attributes:
next_page: The URL to redirect to after logout. Defaults to settings.LOGOUT_REDIRECT_URL.
template_name: The full name of a template to display after logging the user out. Defaults to registration/logged_out.html.
We could pass a custom template name to the LogoutView, but that would mean that we can’t use the URL definition from django.contrib.auth.urls. Instead, we overwrite the template. Therefor, we simply create a new file ‘templates/accounts/logged_out.html’:
You have been logged out. <a href="{% url 'login' %}" Click here to log in again.</a>
If you reload the logout page now, its styling will match the rest of our pages.
If you followed along, your project should now match the tag django_authentication_views_end in the companion repository.
What’s next?
By allowing users to log in and log out of the application, we have implemented an important feature: we can now identify users!
We are not using this feature for anything overly exciting yet, but we’ll get to that in a follow up to this article.
- The login view reads the URL from the setting LOGIN_REDIRECT_URL which defaults to ‘/accounts/profile/’ ↩